Skip to content
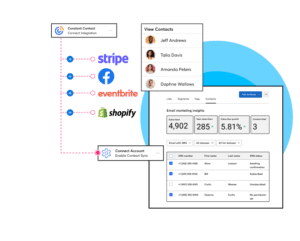
To tag Stripe sales with your Constant Contact list, follow a few simple steps. This process helps you keep track of your customers efficiently.
Managing your customer data can be overwhelming. Linking Stripe sales with your Constant Contact list streamlines this process. With this connection, you can automatically update your email list with new customer information. This means better-targeted email campaigns and more time saved for you.
In this guide, we’ll walk you through the steps to connect these two powerful tools. Get ready to simplify your email marketing and keep your customer database up-to-date effortlessly.

Credit: community.constantcontact.com
Getting Started
Integrating Stripe with Constant Contact can streamline your sales process. This guide will help you tag Stripe sales with your Constant Contact list. Follow these simple steps to get started.
Prerequisites
Before you start, ensure you have the following:
- An active Stripe account
- An active Constant Contact account
- Access to Zapier (or another automation tool)
These tools are essential for the integration process.
Setting Up Accounts
First, set up your Stripe and Constant Contact accounts. If you do not have these accounts, follow the steps below:
- Create a Stripe account:
- Go to the Stripe website.
- Click on “Sign Up” and follow the prompts.
- Fill in your business details.
- Create a Constant Contact account:
- Visit the Constant Contact website.
- Select “Sign Up” and complete the registration.
- Set up your email lists.
Both accounts must be ready and active.
Creating Stripe Account
Creating a Stripe account is your first step towards managing online sales. Stripe is a popular platform for handling payments. It helps businesses process transactions easily. In this section, you’ll learn how to set up your Stripe account.
Sign Up Process
First, visit the Stripe website. Click on the “Sign Up” button. Enter your email address and create a strong password. Confirm your email to proceed.
Next, provide your business details. Include your business name, address, and phone number. Stripe will ask for verification to ensure security. Complete this step by providing required documents.
Configuring Payment Settings
After signing up, log in to your Stripe dashboard. Go to the “Settings” section. Here, you need to set up your payment preferences.
First, link your bank account. This allows Stripe to deposit funds. Enter your bank information accurately. Verify the connection with a small deposit Stripe will make.
Then, configure your payment methods. Stripe supports various options like credit cards, debit cards, and digital wallets. Enable the ones suitable for your business.
Set your payout schedule. Choose how often you want to receive funds. Options include daily, weekly, or monthly payouts. Select the one that fits your cash flow needs.
Lastly, review and save your settings. Your Stripe account is now ready to use. You can start accepting payments and grow your business with ease.
Setting Up Constant Contact
Setting up Constant Contact is essential for managing your email marketing campaigns. This section will guide you through the initial steps to create an account and navigate the dashboard. By understanding these basics, you can effectively tag Stripe sales to your Constant Contact list.
Creating An Account
To start, visit the Constant Contact website. Click on the “Sign Up” button. You will need to provide your email address and create a password. Follow the on-screen instructions to complete the registration process.
After creating your account, you will receive a confirmation email. Click on the link in the email to verify your account. This step is crucial to access all features.
Navigating The Dashboard
Once your account is set up, log in to the Constant Contact dashboard. The dashboard is user-friendly and provides an overview of your campaigns, contacts, and analytics.
On the left side, you will see a menu with various options. These options include “Campaigns,” “Contacts,” and “Reporting.” Familiarize yourself with these sections to manage your email marketing effectively.
The “Contacts” section is where you will add and manage your email lists. This is where you will tag Stripe sales later. The “Campaigns” section allows you to create and send emails. The “Reporting” section gives insights into your email performance.
Navigating the dashboard will help you understand how to use Constant Contact. With a clear understanding, you can seamlessly integrate and tag your Stripe sales.
Integrating Stripe With Constant Contact
Integrating Stripe with Constant Contact can streamline your customer management. This process allows you to tag Stripe sales with a Constant Contact list efficiently. Let’s break down the steps to achieve this seamless integration.
Api Key Generation
Generating an API key is the first step. This key will allow Stripe and Constant Contact to communicate.
- Log in to your Stripe account.
- Navigate to the Developers section.
- Click on API keys.
- Generate a new secret key.
Save this key securely. You will need it later to connect your accounts.
Connecting Accounts
Now, you need to connect your Stripe account with Constant Contact.
- Log in to your Constant Contact account.
- Go to the Integrations tab.
- Select Stripe from the list of available integrations.
- Enter the API key you generated from Stripe.
- Follow the on-screen instructions to complete the connection.
Once connected, you can tag Stripe sales with your Constant Contact list. This will help you manage your contacts effectively.
Integrating Stripe with Constant Contact enhances your marketing efforts. You can easily track and categorize your customers, leading to more targeted campaigns.
Creating Contact Lists
Creating contact lists is essential for effective email marketing. By tagging Stripe sales with a Constant Contact list, you can better manage and engage your customers. Organizing your contacts helps target the right audience with tailored messages.
This section will guide you through the process of creating contact lists. We will cover segmenting customers and the list creation process.
Segmenting Customers
Segmenting customers allows you to group them based on certain criteria. This can include purchase behavior, location, or interests. Segmentation helps send relevant emails to each group. For example, you can send promotional offers to frequent buyers. This increases the chances of engagement and sales.
Start by analyzing your customer data. Identify patterns and common characteristics. Use these insights to create segments. Remember, the more specific your segments, the more effective your emails will be.
List Creation Process
The list creation process begins with accessing your Constant Contact account. Navigate to the Contacts section. Click on the “Create List” button. Name your new list based on the segment you are targeting.
Next, import your customer data. You can do this manually or by uploading a file. Ensure the data is accurate and up-to-date. Once the data is imported, assign each contact to the appropriate list. This will help you keep your contacts organized.
Finally, double-check your lists. Make sure each contact is in the correct group. This will ensure your emails reach the right audience. Regularly update and maintain your lists for best results.
Automating Sales Tagging
Automating sales tagging can save time and reduce errors. By linking Stripe sales with Constant Contact lists, you can streamline your workflow. This helps in targeting your email campaigns more effectively.
Setting Up Automation Rules
First, log in to your Constant Contact account. Navigate to the ‘Automation’ section. Click on ‘Create New Automation’. Choose ‘Sales from Stripe’ as the trigger.
Next, you’ll need to connect your Stripe account. Click ‘Connect Stripe’. Follow the prompts to authorize the connection. Once connected, select the specific event that triggers the automation, such as ‘Successful Payment’.
Now, you need to define the action. Choose ‘Add to List’ as the action. Select the desired email list from your Constant Contact account. This list will receive the new sales contacts.
| Step | Action |
|---|---|
| 1 | Log in to Constant Contact |
| 2 | Navigate to ‘Automation’ |
| 3 | Click ‘Create New Automation’ |
| 4 | Choose ‘Sales from Stripe’ as the trigger |
| 5 | Connect Stripe account |
| 6 | Select ‘Successful Payment’ as the event |
| 7 | Choose ‘Add to List’ as the action |
| 8 | Select the desired email list |
Testing The Automation
Before going live, it’s crucial to test the automation. Make a test purchase through Stripe. Check if the contact is added to the Constant Contact list. Ensure that all details are correct.
To test, follow these steps:
- Make a test purchase on your Stripe account.
- Log in to Constant Contact.
- Navigate to the selected email list.
- Verify the new contact’s addition.
If everything works as expected, your automation is ready. If not, revisit the setup steps. Correct any errors you find. Testing ensures that your automated workflow functions smoothly.
Tagging Sales In Stripe
Tagging sales in Stripe helps you keep track of transactions. You can easily manage your customer data and streamline your marketing efforts. This is especially useful when integrating with platforms like Constant Contact. Proper tagging ensures you can send targeted emails to the right people.
Manual Tagging
Manual tagging allows you to add specific tags to each sale. This method is straightforward but can be time-consuming. You need to go into your Stripe dashboard and add tags to individual transactions. This is useful for small businesses with fewer transactions.
To manually tag, first, open your Stripe account. Go to the ‘Payments’ section and select the transaction you want to tag. Add a relevant tag in the tag field. Save your changes. This process helps you categorize sales based on criteria like product type or purchase date.
Automated Tagging
Automated tagging simplifies the process. It uses predefined rules to tag sales automatically. This is ideal for businesses with many transactions. Automation saves time and reduces errors.
To set up automated tagging, use Stripe’s integration tools. Connect Stripe with Constant Contact using a third-party tool like Zapier. Configure the tool to apply tags based on your criteria. For example, you can tag sales by product type or amount spent. This helps you maintain an organized and up-to-date customer list in Constant Contact.
Syncing Data With Constant Contact
Syncing data with Constant Contact ensures seamless integration between your Stripe sales and your email marketing efforts. This integration helps you automatically tag contacts based on their purchase behavior. This process streamlines your marketing campaigns, making them more effective and targeted.
Data Mapping
Before starting the sync, ensure that your data is mapped correctly. Data mapping involves aligning fields in Stripe with corresponding fields in Constant Contact. This step is crucial for accurate data transfer.
For instance, map the Stripe customer email to the Constant Contact email field. Similarly, map the purchase date and amount to their respective fields in Constant Contact. This alignment ensures that all relevant information is captured and utilized effectively.
Real-time Sync
Enabling real-time sync keeps your data updated without manual intervention. This feature ensures that any new sale in Stripe is instantly reflected in Constant Contact. Your contacts are tagged based on their purchase behavior.
To set up real-time sync, use integration tools like Zapier or Integromat. These tools facilitate seamless data transfer between Stripe and Constant Contact. Set up triggers in these tools to initiate sync whenever a sale occurs in Stripe.
Here’s a simple setup example using Zapier:
- Log in to Zapier and create a new Zap.
- Select Stripe as the trigger app and choose “New Sale” as the trigger event.
- Connect your Stripe account to Zapier.
- Select Constant Contact as the action app and choose “Add/Update Contact” as the action event.
- Map the fields from Stripe to the corresponding fields in Constant Contact.
- Test the Zap to ensure the integration works correctly.
Following these steps ensures a smooth and efficient syncing process. Your email marketing campaigns become more targeted and effective.
Customizing Tags
Customizing tags in Constant Contact can streamline your email marketing. This helps in organizing your contacts effectively. By tagging Stripe sales, you ensure targeted communication. Custom tags also provide specific data insights. Let’s explore how to create and apply these tags.
Creating Custom Tags
Creating custom tags is simple. Begin by logging into your Constant Contact account. Navigate to the “Contacts” section. Click on “Manage Tags” to start. Here, you can add new tags. Choose names that reflect the type of Stripe sale. For example, use “Product A Sale” or “Service B Purchase”. This makes it easy to identify your contacts.
After naming, save the tag. Repeat this process for different Stripe sales. Custom tags allow better segmentation. This leads to more personalized email campaigns. Ensure each tag is unique and descriptive.
Applying Tags
Applying tags to contacts is crucial. First, go to your contact list. Select the contacts you want to tag. Click on “Manage Tags” from the actions menu. Choose the relevant custom tag from the list. Apply it to the selected contacts. This action updates their profiles.
For Stripe sales, integrate your Stripe account with Constant Contact. Use automation tools to tag contacts after a sale. This saves time and reduces manual work. As sales occur, tags are applied automatically. This keeps your contact list organized.
Review your tags regularly. Remove outdated or incorrect tags. This maintains the accuracy of your contact data. Properly applied tags enhance your marketing efforts.

Credit: www.elegantthemes.com
Monitoring And Reporting
Monitoring and reporting are crucial for understanding your sales performance. By tagging Stripe sales with a Constant Contact list, you can gain valuable insights. These insights help in making informed decisions and improving your marketing strategies.
Tracking Sales
Tracking sales helps you understand your business performance. With Stripe, you can easily monitor every transaction. Tagging these sales with a Constant Contact list allows for better organization. You can see which customers are making purchases and how often. This information is vital for targeting your marketing efforts.
Generating Reports
Generating reports is essential for analyzing your sales data. Stripe offers robust reporting tools. When you tag Stripe sales with a Constant Contact list, reporting becomes more efficient. You can generate reports that show detailed customer behaviors. These reports help identify trends and patterns in your sales data.
Use these reports to adjust your marketing strategies. Focus on what works best. This approach ensures you are always improving and optimizing your efforts.
Troubleshooting Common Issues
Tagging Stripe sales with your Constant Contact list can sometimes be tricky. But don’t worry. We’ve got you covered. Let’s address some common issues you might face.
Connection Problems
Connection problems are a frequent issue. Make sure your Stripe and Constant Contact accounts are both active. Verify your login credentials for both platforms.
Check your internet connection. A stable connection is crucial. Disable any VPNs or firewalls that might block access. Restart your computer or device to refresh the connection.
Here’s a simple checklist:
- Active Stripe and Constant Contact accounts
- Correct login credentials
- Stable internet connection
- Disabled VPNs or firewalls
- Restarted device
Tagging Errors
Tagging errors can be frustrating. Ensure you are using the correct tags. Double-check your tag names in both Stripe and Constant Contact.
Tags must match exactly. Case sensitivity matters. For example, ‘Sale’ and ‘sale’ are different. Use consistent naming conventions.
If you still face issues, follow these steps:
- Log in to your Constant Contact account.
- Navigate to the tag settings.
- Verify the tag names and spelling.
- Compare with tags in Stripe.
- Update any mismatched tags.
Still no luck? Try resetting the integration. Remove the connection between Stripe and Constant Contact. Reconnect them following the setup guide. This often resolves any lingering issues.
Advanced Integration Techniques
Integrating Stripe sales with Constant Contact requires advanced techniques. It’s not just about connecting two platforms but ensuring seamless data flow. This section delves into the advanced methods to achieve this.
Using Webhooks
Webhooks offer real-time data transfer between Stripe and Constant Contact. They act as automated messages sent from one app to another. When a sale occurs on Stripe, a webhook can notify Constant Contact.
Here’s how to set up a webhook:
- Log in to your Stripe account.
- Navigate to Developers > Webhooks.
- Click on Add endpoint.
- Enter your Constant Contact endpoint URL.
- Select the events you want to listen for, such as checkout.session.completed.
- Click Add endpoint.
Constant Contact can now receive data from Stripe. This integration ensures timely and accurate updates.
Custom Api Integrations
APIs provide flexible and powerful integration options. You can tailor the data flow between Stripe and Constant Contact. Custom API integrations require some coding knowledge.
Follow these steps for a basic integration:
- Obtain API keys from both Stripe and Constant Contact.
- Use a server-side language like Python or Node.js.
- Write a script to handle Stripe events and send data to Constant Contact.
- Ensure your script is secure and handles errors.
Here’s a simple example in Python:
import stripe
import requests

stripe.api_key = 'your_stripe_api_key'

def handle_stripe_event(event):
    if event['type'] == 'checkout.session.completed':
        session = event['data']['object']
        customer_email = session['customer_email']
        add_to_constant_contact(customer_email)

def add_to_constant_contact(email):
    url = "https://api.constantcontact.com/v2/contacts"
    headers = {
        "Authorization": "Bearer your_constant_contact_api_key",
        "Content-Type": "application/json"
    }
    data = {
        "email_addresses": [{"email_address": email}]
    }
    response = requests.post(url, headers=headers, json=data)
    return response.json()
This script listens for Stripe events and adds the customer’s email to Constant Contact.
These advanced techniques provide control and flexibility. They ensure your sales data syncs accurately and promptly.
Security Considerations
When integrating Stripe sales with a Constant Contact list, maintaining security is crucial. This process involves handling sensitive customer information. Therefore, you must consider multiple security measures to protect data and ensure compliance with regulations.
Protecting Customer Data
Customer data protection is a top priority. This involves securing transaction details, personal information, and email addresses.
- Encryption: Always use encryption to protect data in transit and at rest.
- Secure Storage: Store customer data in a secure database.
- Access Control: Limit access to customer data to authorized personnel only.
Ensuring Compliance
Compliance with data protection regulations is essential. This ensures you handle customer data legally and ethically.
- GDPR: If you handle data of EU citizens, comply with GDPR regulations.
- CCPA: For California residents, follow the CCPA guidelines.
- PCI DSS: Ensure your Stripe integration meets PCI DSS standards.
Maintaining security and compliance helps build customer trust. It also protects your business from legal issues and fines. By following these steps, you can securely tag Stripe sales with your Constant Contact list.
Best Practices
Easily tag Stripe sales with your Constant Contact list by integrating the two platforms. This helps streamline your email marketing efforts and keeps your contacts organized.
Incorporating best practices ensures your tagging and list management is effective. This helps in better segmentation and targeting for your campaigns. Follow these guidelines for optimal performance.Optimizing Tagging
Optimize your tagging process to make it efficient and straightforward. Use clear and specific tags for each sale. This helps in identifying the sales source quickly. Avoid using generic tags as they can create confusion. Keep your tags consistent across all campaigns. Consistency helps in easy tracking and reporting. Regularly review and update your tags to maintain relevance.Maintaining Lists
Maintaining your Constant Contact lists is crucial. Regularly clean your lists to remove inactive contacts. This improves your engagement rates. Segment your lists based on customer behavior and preferences. Use dynamic lists to automatically update based on specific criteria. This saves time and ensures your lists are always up-to-date. Regularly review your list segments to ensure they align with your marketing goals. “`Case Studies
Tagging Stripe sales with a Constant Contact list can streamline your email marketing. This integration helps in segmenting your audience and targeting them more effectively. Real-world examples show the benefits and challenges of this integration.
Successful Integrations
Company A, an online retailer, tagged their Stripe sales with Constant Contact lists. They saw a 30% increase in email open rates. By segmenting their audience, they sent tailored emails. Customers received relevant content, leading to higher engagement and sales.
Another example is a non-profit organization. They used this integration to track donations. They tagged donors based on donation size and frequency. This helped in sending personalized thank-you emails. Their donor retention rate improved by 25%.
Lessons Learned
One lesson from these case studies is the importance of data accuracy. Ensure that Stripe and Constant Contact data are synced properly. Incorrect data can lead to sending wrong emails, frustrating customers.
Another lesson is the need for regular monitoring. Keep an eye on the integration to spot any issues early. Regular checks help in maintaining smooth operations and avoiding disruptions.
Lastly, personalize your emails based on the tagged data. Tailored content resonates more with the audience. Personalization leads to better engagement and higher conversion rates.
Tips And Tricks
Integrating your Stripe sales with Constant Contact can streamline your marketing efforts. But understanding the best tips and tricks is key to making the most out of this integration. With these insights, you can ensure a smooth and efficient workflow, avoid common mistakes, and enhance your customer engagement strategy.
Efficiency Hacks
First, automate the process. Use tools like Zapier to connect Stripe and Constant Contact. This saves time and reduces manual errors. Set specific triggers in Zapier. For example, when a sale is made in Stripe, a contact gets added to your Constant Contact list.
Next, segment your contacts. Not all customers are the same. Create different lists in Constant Contact based on purchase behavior. This helps in sending targeted emails. Personalization increases engagement and conversion rates.
Regularly update your lists. Ensure your data is current. Outdated information can lead to ineffective campaigns. Use scheduled tasks to clean and update your contact lists automatically.
Common Pitfalls
One common mistake is not testing the integration. Before going live, run several tests. Ensure data is transferred correctly between Stripe and Constant Contact. Check if triggers work as expected.
Another pitfall is ignoring data privacy. Make sure to comply with data protection laws. Inform your customers about data usage. Secure their consent before adding them to your contact lists.
Also, avoid overloading your contacts with emails. Too many emails can lead to unsubscribes. Maintain a balanced frequency. Monitor engagement metrics to find the optimal email schedule.
Tools And Resources
To efficiently tag Stripe sales with your Constant Contact list, you need the right tools and resources. These tools make the process smooth and save time. You will also find helpful guides that simplify each step.
Recommended Software
Using the correct software is essential for this process. Stripe and Constant Contact are the primary tools. Stripe handles the payment processing. Constant Contact manages your email lists. Another helpful tool is Zapier. Zapier connects different apps and automates tasks between them.
Zapier creates workflows called Zaps. A Zap can be set up to tag a sale in Stripe and update your Constant Contact list. This automation saves time and reduces errors.
Helpful Guides
Several guides are available to assist you. These guides provide step-by-step instructions. Stripe’s official documentation is a good starting point. It explains how to use their API and other features.
Constant Contact offers tutorials on managing lists and tags. These tutorials help you understand how to organize and segment your audience. Zapier’s guide on creating Zaps is also valuable. It explains how to connect Stripe and Constant Contact.
Online forums and community pages can provide additional tips. Many users share their experiences and solutions. These resources are beneficial for troubleshooting and learning best practices.
Faqs
Integrating Stripe with Constant Contact can streamline your business. This FAQ section addresses common issues and provides expert answers to help you tag Stripe sales with your Constant Contact list effortlessly.
Common Questions
- What is the first step to integrate Stripe with Constant Contact?
- Can I tag customers automatically in Constant Contact?
- How do I ensure data syncs properly?
- Is technical knowledge required for this integration?
- Can I filter Stripe transactions in Constant Contact?
Expert Answers
What is the first step to integrate Stripe with Constant Contact?
First, create accounts on both platforms. Then, access the integration settings in Constant Contact.
Can I tag customers automatically in Constant Contact?
Yes. Use automation tools available in Constant Contact to tag customers based on their Stripe transactions.
How do I ensure data syncs properly?
Regularly check integration settings. Ensure APIs are up to date. Use webhooks for real-time updates.
Is technical knowledge required for this integration?
Basic knowledge is helpful but not required. Follow step-by-step guides available on both platforms.
Can I filter Stripe transactions in Constant Contact?
Yes. Use the segmentation tools in Constant Contact to filter and manage transactions based on tags.

Credit: fluentcrm.com
Frequently Asked Questions
What Is Stripe And Constant Contact Integration?
Stripe and Constant Contact integration allows you to tag sales with specific lists. This helps in effective email marketing.
How Do I Connect Stripe With Constant Contact?
You can connect Stripe with Constant Contact via third-party tools or APIs. This ensures seamless data synchronization.
Why Tag Stripe Sales With Constant Contact Lists?
Tagging sales helps in segmenting customers. This leads to targeted marketing and improved engagement.
Can I Automate Tagging Stripe Sales?
Yes, automation tools can tag Stripe sales. This saves time and reduces manual errors.
Conclusion
Tagging Stripe sales with Constant Contact lists improves marketing efficiency. This process enhances customer segmentation. By following the steps, you ensure better communication with your customers. This integration streamlines your workflow. With consistent practice, it becomes second nature. Remember, accuracy is key.
Keep your data organized. Always double-check your tags. Happy tagging!